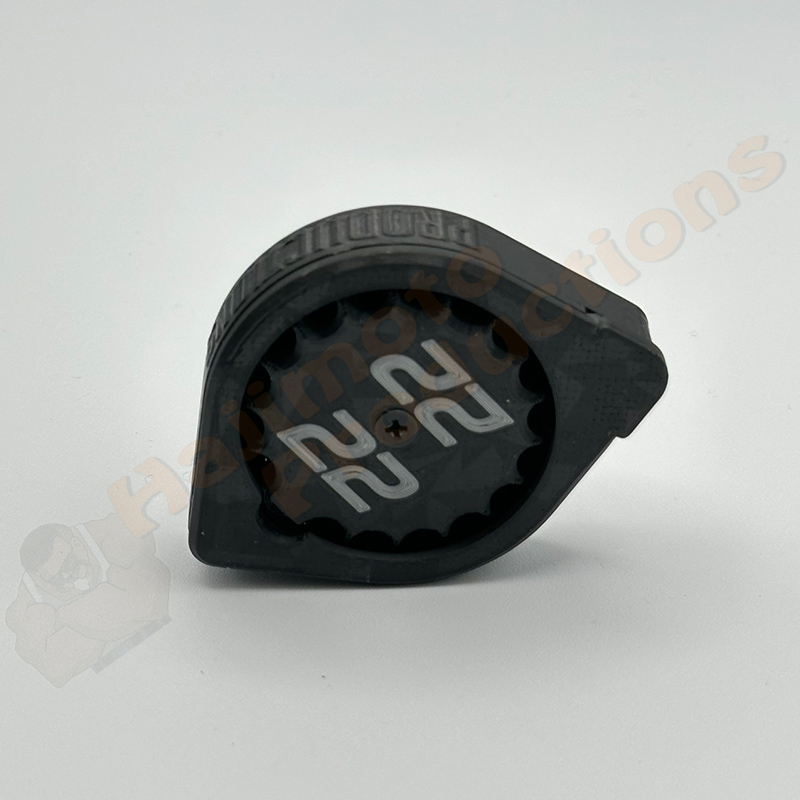
Hello guys and gals we are excited to introduce a completely redesigned HP magazine that allows for easier loading and simpler operation.
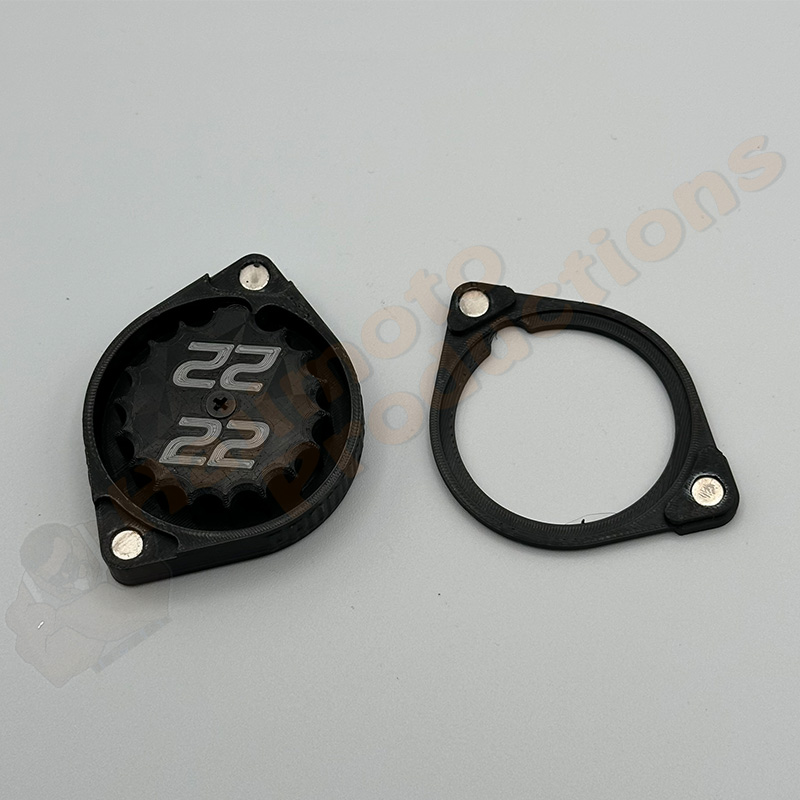
The new HP Mag 2.0 will eventually replace the previous no-lid design in all calibers such as .177, .22, .25, and .30 in both the expanded and the mini versions. The new design utilizes strong neodymium magnets that allow full access to the magazine loading slot. This means no more fighting to drop pellets/slugs into a limited window or opening during loading.
The magnets force the lid to align in one direction. They are also so strong that they typically spin the lid so it aligns almost automatically!
Just like the original magazines, these HP 2.0 designs are platform-specific which means we spent many hours tweaking and adjusting fit and operation to each specific PCP. This means you will have a well-fitting close-tolerance part that is durable and looks great for thousands of shots.
The first few HP 2.0 designs to be released are the .22 Gauntlet Expanded, .22 Notos, .22 Origin Expanded, .22 Avenger Expanded, and .22 Benjamin Marauder.
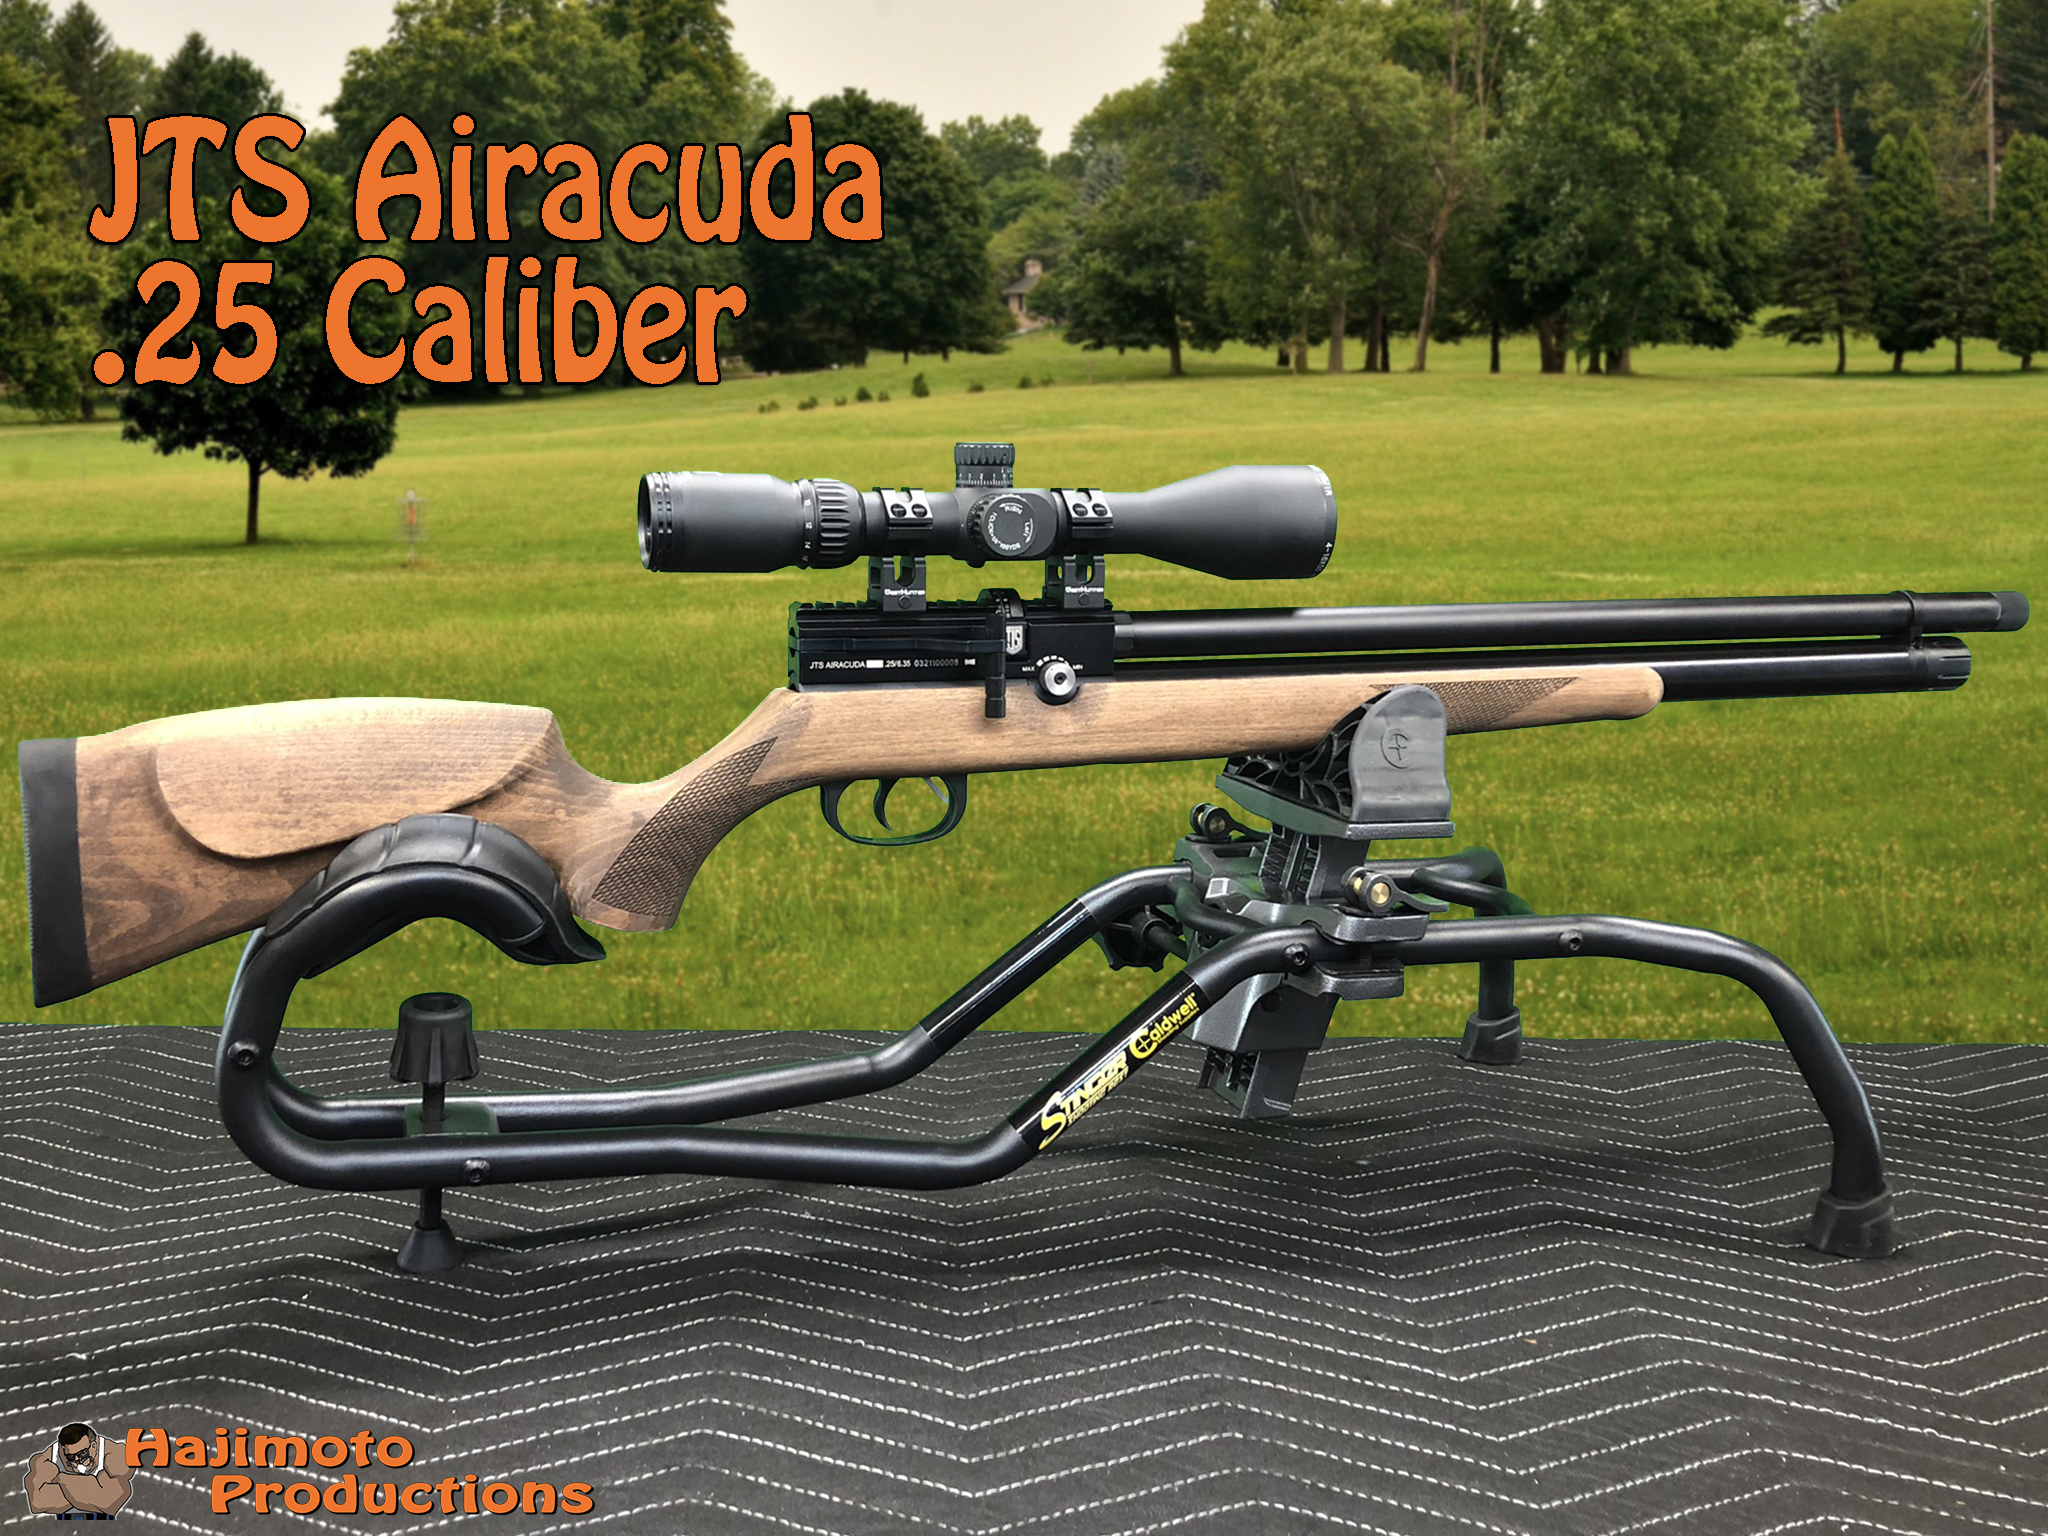
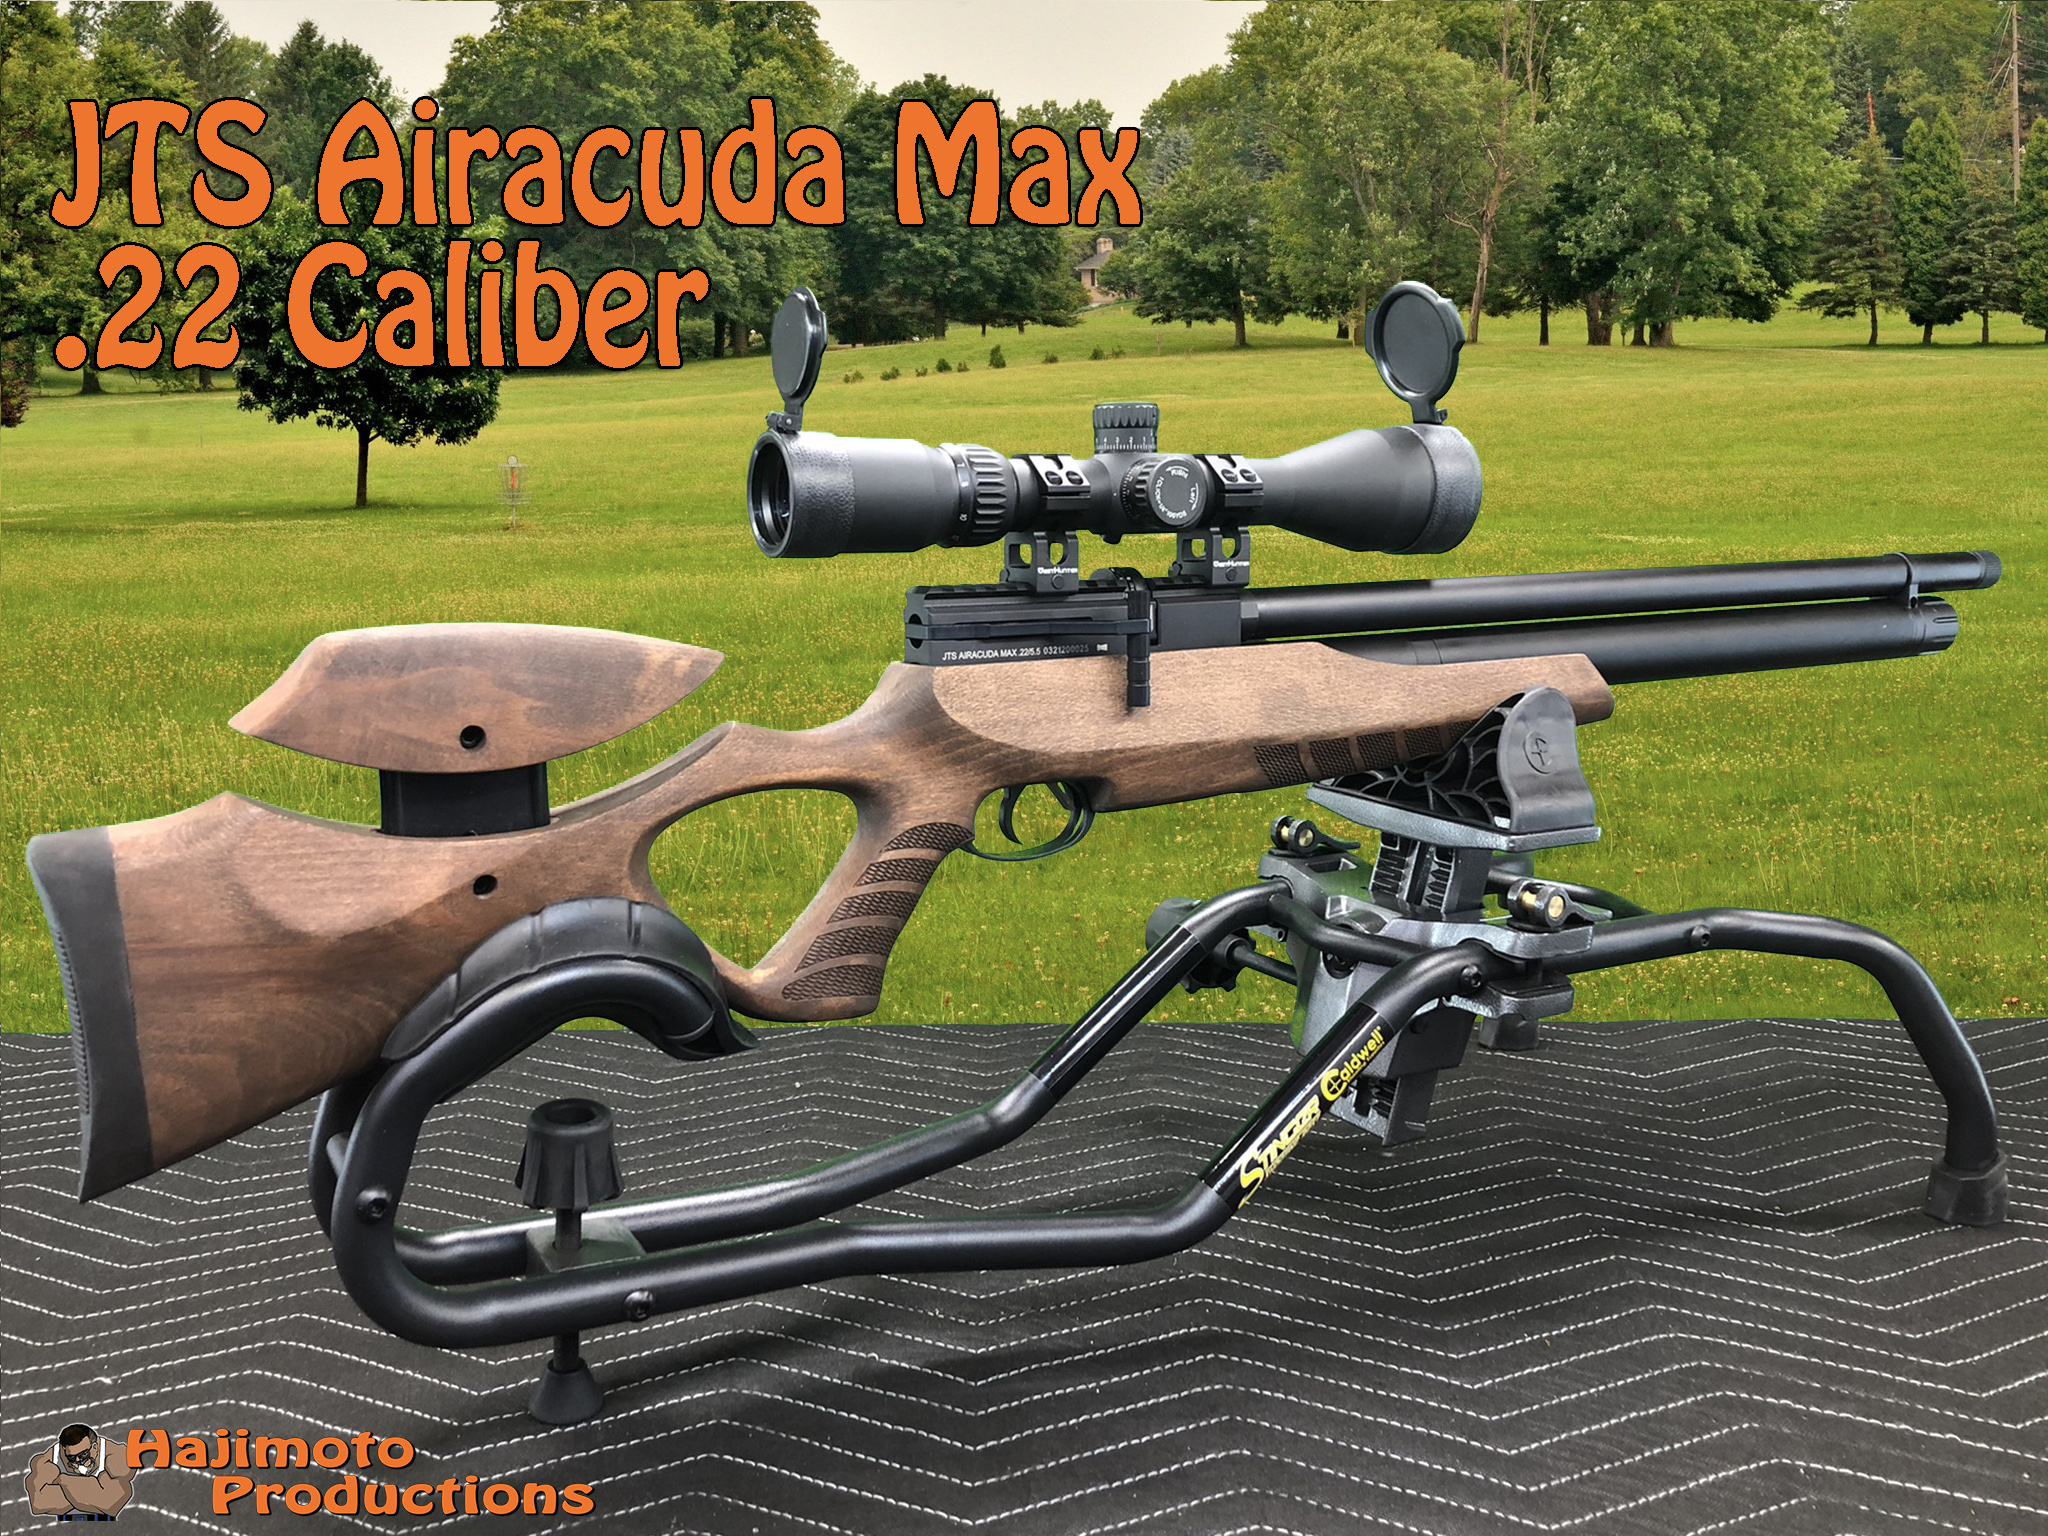
The JTS Airacuda line of PCP's is coming to Hajimoto Productions in the spring of 2022.
The two rifles that JTS is starting off in the Airacuda series are the Standard and the Max. The standard is a non-regulated conventional stock design PCP with transfer port power and hammer preload power adjustments. The standard also comes with side lever cocking and two magazines.
The Max is a regulated version with a slick thumbhole stock, side lever cocking, the barrel end is ready for your favorite moderator and has hammer preload power adjustment.
As some of you may know already, I have already designed some enhancements and performance packages for the series. Hajimoto Productions will be offering these models with enhanced performance and calling them the Hemi 'Cuda Standard and Hemi 'Cuda Max. I will be offering multiple packages that range from minimal enhancement to full-blown packages that include optic and compressor just like I do for the Umarex Gauntlet line of PCP's.
If you want to follow along with the progression of these amazing air guns, please consider joining our Facebook Group called Airacuda Owners Group. There are already a lot of photos, shot results, and discoveries relating to these incredible feature-rich PCP's.
Coming soon!!! Be sure to keep an eye out!
Here is a sneak peek of the Airacuda series from our friends at DonnyFL. Izzy goes through the standard and the Max.
Today we are going to talk about preventative maintenance of your HPA system.
There are some expressions that we hear all the time and most are cliches at this point. One that fits this conversation is the “Out of sight out of mind” cliché. When it comes to operational maintenance there are varying degrees of maintenance, and each is dependent on how critical that maintenance is to keep the mechanism functioning and operating as the designer intended.
There are some folks that use a very basic visual flyover and if there are no fluids dripping or parts that have fallen off the equipment on the ground, it’s good to go. This cursory approach is ok for some simple mechanical devices like external pully or gear systems. High-Pressure Air (HPA) systems are not that type of low maintenance system.
Obvious maintenance required
Tanks, hoses, compressors, filters, and other parts that make up the HPA system, require regular maintenance and visual inspection.
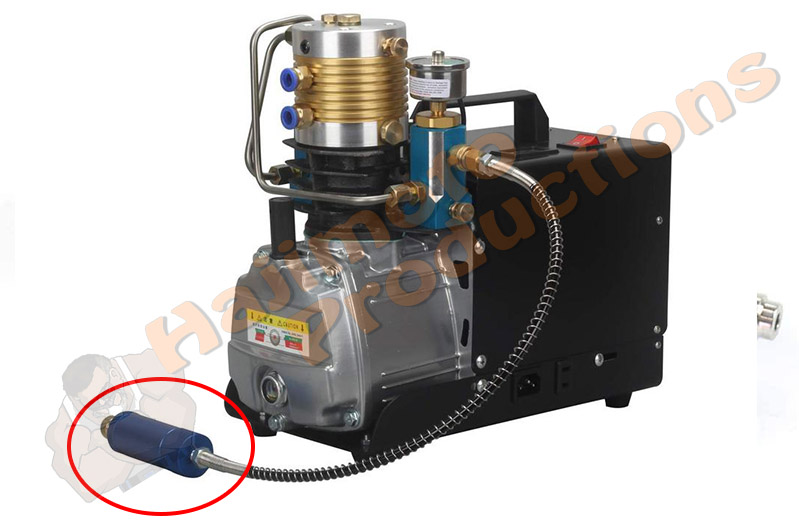
Today there are so many affordable personal compressors available all of which have varying degrees of quality materials used in their construction, and because there is no way of knowing what materials are used, regular visual inspection is critical.
Most if not all these little compressors follow a similar design characteristic and that is a smaller and smaller footprint. This small portable design means they all suffer from the same issue and that is inadequate water/oil separation systems.
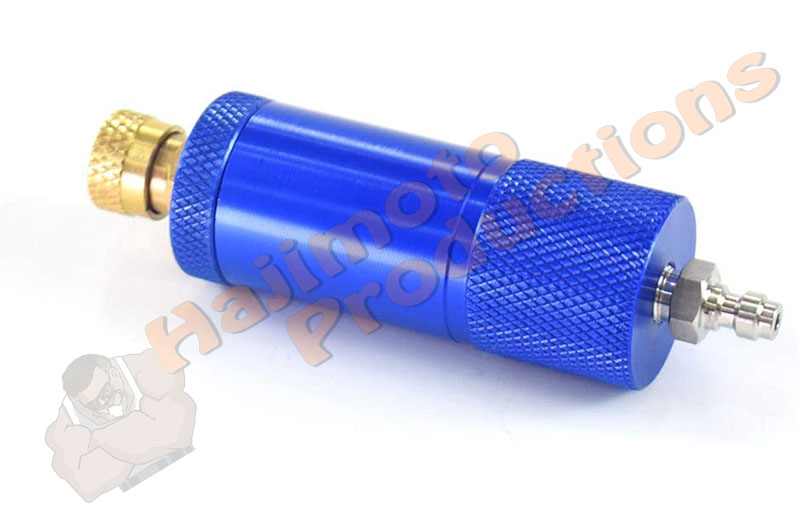
Typical small filter
Proper water and oil separation need surface area and volume to cool, condense and separate. If there is not a dedicated quality filter/separator employed in an HPA fill source, major damage will occur to tanks as well as your precious air rifle and, in some cases, you!
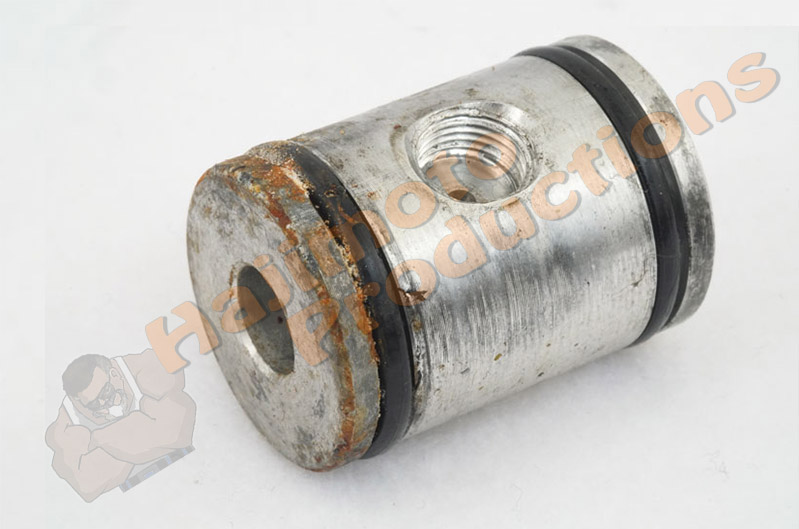
Corrosion in an aluminum tank
Most folks see the small canister-type filter at the end of the fill whip and think that is enough. While something is better than nothing, that small device is only going to stop some moisture, oil, and large particulate but it will not be able to properly remove large amounts of water and oils from the air. There simply is not enough volume or surface area to properly condense the hot wet air and allow it to collect and separate in a properly designed chamber.
Not very effective but better than nothing
What happens is the warm air loaded with water vapor reaches the pressure vessel either your fill tank or your rifle’s air storage vessel and cools down. When it cools down, condensation takes place and all the internal surfaces of your tank or worse, your PCP becomes wet and starts to corrode.
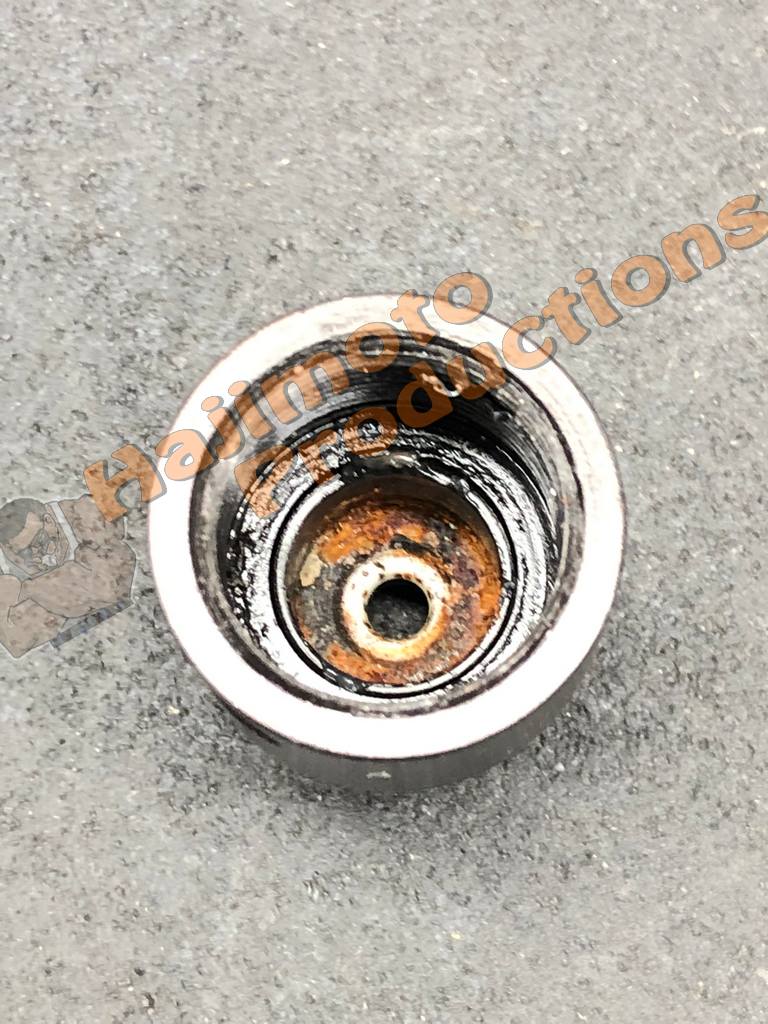
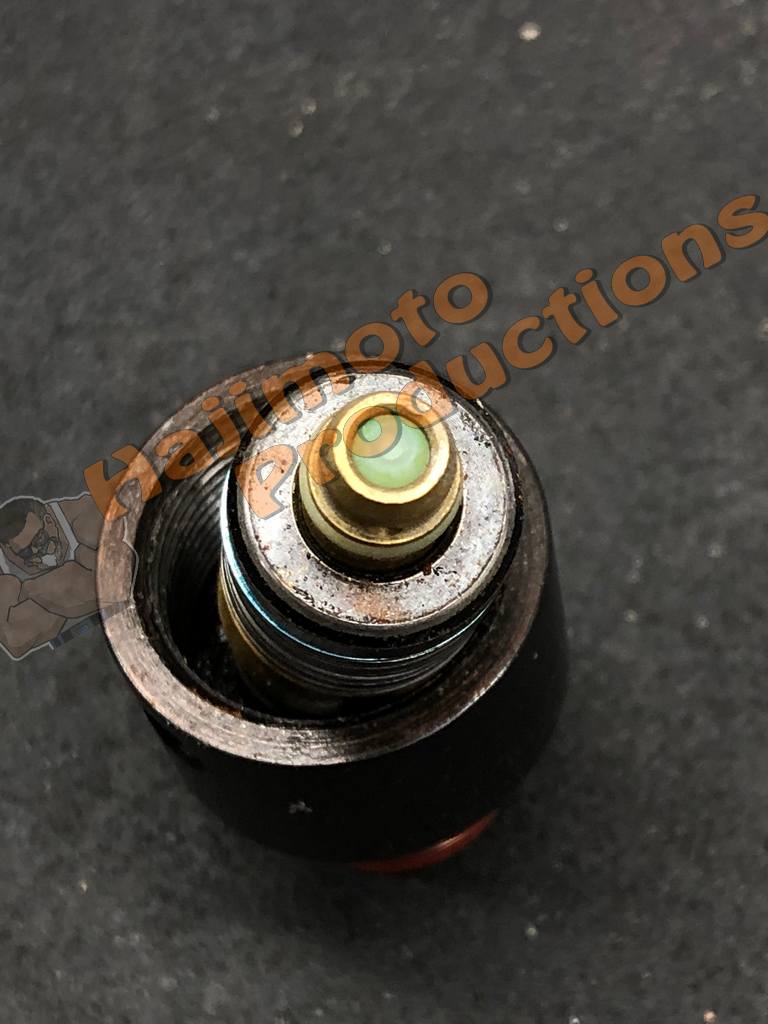
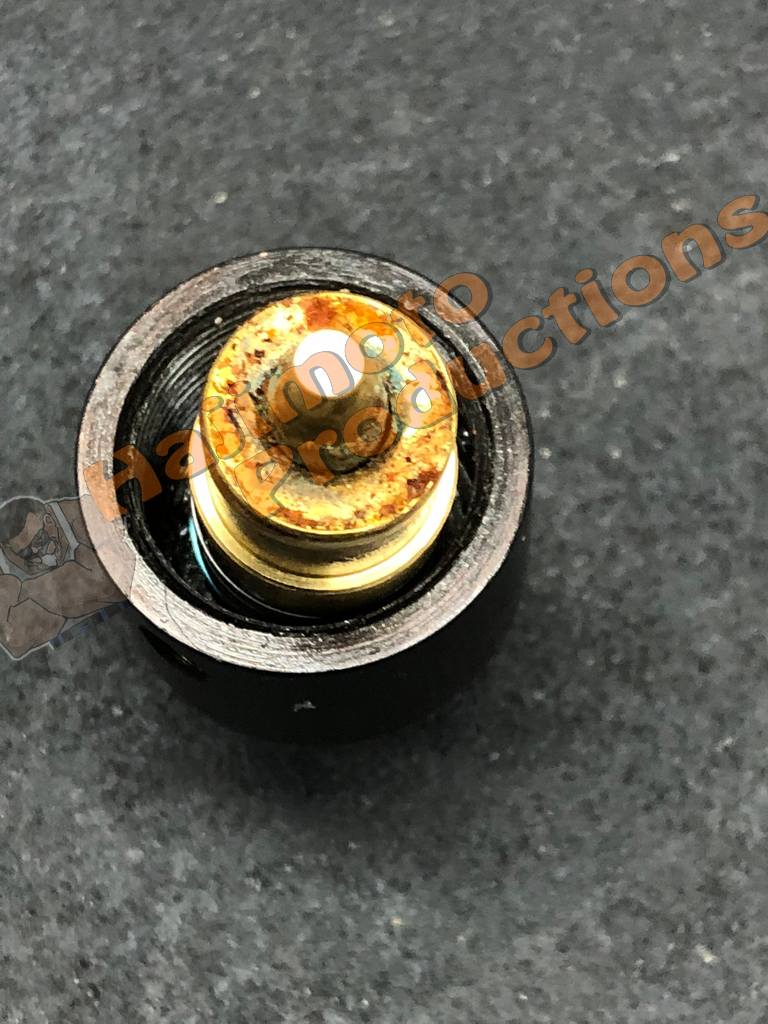
Here are actual photos of what the inside of a customer regulator looked like after being exposed to water and corrosion. Keep in mind that that crap was being pushed into his air rifle which ultimately cause it to fail.
Ball seal failurePin and spring destroyedSevere corrosion
Over the years the paintball world has shown many cases of HPA tanks sitting for a long time that had corrosive water in the tank resulting in aluminum etching creating aluminum oxide powder puffing out the barrel with every shot. That white powder cloud is visual proof that the pressure vessel is eroding.
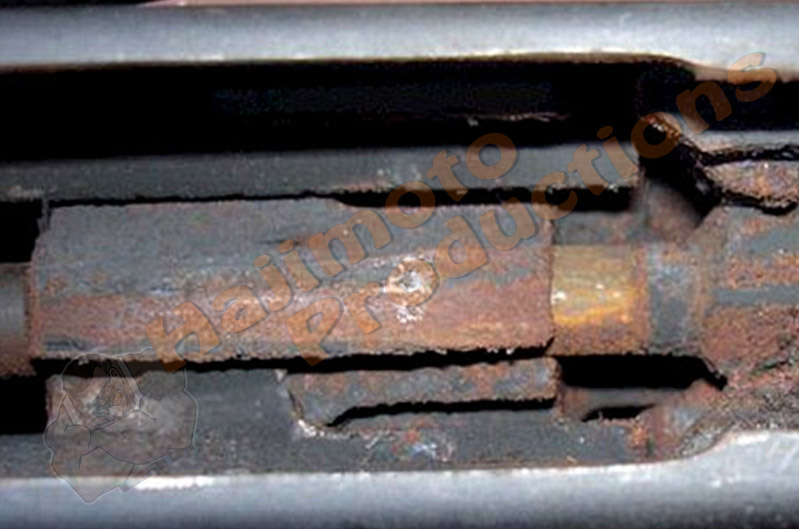
Therefore regular inspections of all of the internal passages of your HPA system need to be executed. Some manufacturers use chrome-plated carbon steel fittings which from the outside look fine but are rusting and corroding on the inside. When you fill your rifle with that air, you are pushing all that debris into your air tank or air rifle which as you can imagine jacks stuff up.
Rust and corrosion caused by zero maintenance
So, if you spare the cash on an HPA compressor but invest in a good quality water/oil separator combined with a regular inspection regimen, you will be fine. If you purchase a very good quality compressor with stainless steel fittings and quality air cooling/separation components, you will enjoy the sport more. Remember the golden rule as it relates to time and money, whatever you save on one, requires a greater investment by the other.
Be sure to check out the awesome modular suppressor that was just released by DonnyFL. The Fat Boy 2.0 is built like a soup can, The large volume area (2 x 4.25 inches), gobbles up noise, and fits all caliber between .177 to .30!
Because the unit ships with three different-sized air strippers, you have the versatility to install this on whatever PCP you're currently using. The air stripper is not an internal part and quickly and easily is swapped out from the front of the Fay Boy using a coin to loosen and unscrew the air stripper.
The difficult chambering issue is something that I have witnessed and documented in the past and there are a few things that you can do to alleviate some of the effort to chamber a round. I am going to get a bit geeky here but I want to describe what the internal of a bore look like from the breech end to the barrel.
Typically the breech will be just large enough to accept the projectile being offered and allow it to be transported by the pellet probe or cocking bolt into the chamber area of the barrel. Along the way to the final resting spot prior to firing the rifle, the projectile is being led into a narrowing transfer passage which introduces the projectile to the rifling. This chamber or lead-in (leed in) area of the barrel should be a smooth and gradual transition from breech to chamber. The Gauntlets breech to chamber transition is very steep and shallow. SEE PHOTO A BELOW
If you use a projectile with a fairly soft lead it will be able to be wedged past that very sharp and abrupt step you see there in the lead in but harder ammo like H&N or Crosman will be very difficult to push into that hard edge.
So what to do? There are a few things to consider.
If you continue to use the rifle and continue to chamber round after round after round that edge will soften over time or "break-in" but if you're in pain and the effort negates the interest to continue, that is not an option.
You can use only soft lead projectiles like JSB or FX which will require far less effort to chamber but that would limit your ammo choice and put you in what I consider "Premium Ammo Cost".
Physically working the problem, mechanically changing the chambers' current state.
Of these options, 1 & 2 really do not need any further discussion because they are what they are.
Option 3 means you void your factory warranty. So you will have zero recourse for any future warranty claims. Option 3 can be achieved in two ways.
Commission a gunsmith to execute the work.
Do it yourself.
Option 1, means you contact your trusted gunsmith like me and have them perform the barrel modification. If you do not have a trusted gunsmith and need one, ask around and get some opinions from your brothers and sisters in the airgun community. Hopefully, you will have someone local to you and it will make the modification a simple drop-off and pick-up affair.
Option 2, As I have publically demonstrated over the years, I am very much a DIY type of guy and I do not allow warranties to govern my level of enjoyment with a product that bought and own. Now please understand that I am saying that a $30,000.00 purchase falls into this category, I do apply reason to the situation and here we are talking about a total loss of $400 if I completely destroy the product. Which to be honest could never happen, at worse, I'd need to replace the barrel.
That said, there are a lot of means and methods to soften that hard edge or to deepen the chambering portion of the lead-in. It can and has been done by many DIY gunsmiths in the past. The best way is the way that gets it done for you. I have seen guys use a fine-tooth rasp and work those edges down by hand working through the breech, I have seen folks use a Dremel with finely tapered stone attachments, I have even seen folk purchase a tapered ream and work the transition. Any of those techniques will work but they have a risk of introducing inconsistency to the landings which can cause projectile deformity and possibly cause inaccuracy issues.
If you do take on the DIY approach, I recommend two variables be employed when doing something for the first time.
Work slow.
Be concentric.
Point number 1 means staying away from course or rapid material changes. Use very fine tooling, sandpaper, emery cloth, polishing papers, or what have you, this affords you the luxury of time. Take it slow and easy which will prevent catastrophic material removal leaving you with a worse scenario than when you started.
Point 2 means using something that keeps tooling in the center and that works all points of contact at the same time. This is where lathes come in handy because they help eliminate the runout (inconsistency along a length) that can be caused by doing things by hand but I am here to tell you, you do not NEED a lathe if you work slow and a concentric as possible.
One method that I used for years was the tapered and partially split wooden dowel method. It is achieved by using a wooden dowel close to the size of the bore that is sharpened like a pencil at one end and the tip is split down its length for the first 1.5"-2" to allow 2000, 3000, or 5000 grit wet sandpaper to be introduced. You can lock the barrel in a soft jaw vise and chuck the dowel in a variable speed drill motor or cordless drill. This tapered ultra-fine grit assembly is introduced into the breech and allowed to work that shoulder down and create a smooth polished ramp into the chamber.
https://youtu.be/eCRdtZB9tXY
An example of what the transformation would look like.
I can expand on this or other DIY means and methods but I am certain that you will find some content out there that will demonstrate what I have described above. Please let me know if you have any additional questions or comments.
Well here is a DonnyFL produced video that will help take the mystery out of size selection. It can be confusing but understanding the way your rifle is built is crucial to making the proper choice.
These magazines are available for the following models and calibers.
Umarex Gauntlet 1 & 2 in .22 or .25.
Umarex Origin in .22.
Air Venturi Avenger in .22.
The Avenger .25 Caliber is soon to come.
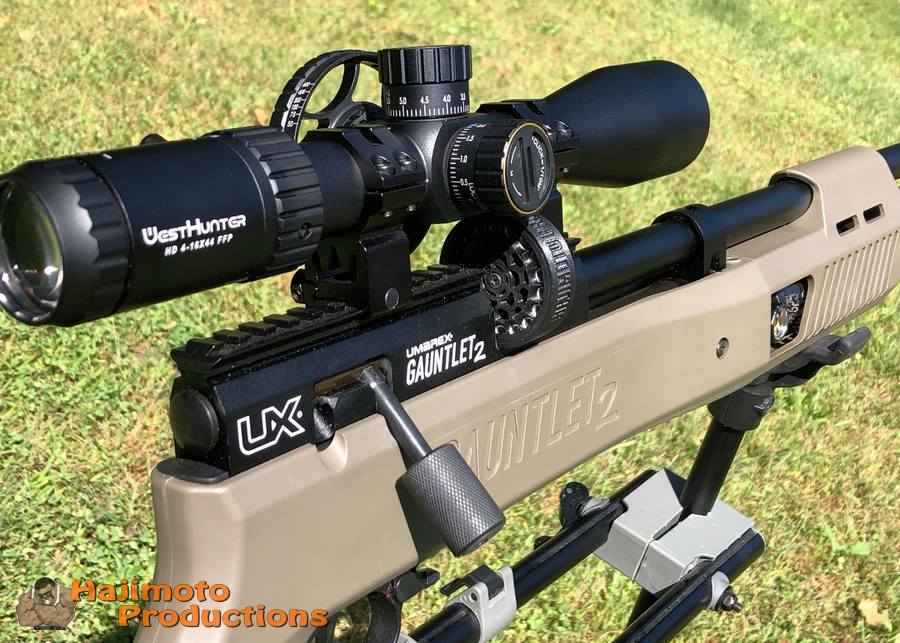
These designs hold 17 rounds for .22 and 15 rounds for the .25 caliber. That is a 70% increase in shots in .22 and 87.5% increase for the .25 caliber!
The photo shows the magazine installed in a G2 with standard fixed rings under a WestHunter 4-16x44 FFP 30mm tube scope. Some configurations may require adjustable rings like the FX No Limit, Eaglevision Infinity or Sports Match UK Rings for additional clearance.
I wanted to take a moment and communicate to my customers and followers because there are so many OUT OF STOCK or SOLD OUT items on my site for that last few months.
First and foremost, I am not closing or shutting down Hajimoto Productions. I am at the mercy of suppliers and they are handcuffed by the manufacturers who are not able to get raw materials in their plants to make the items required to produce the parts or complete products I use or sell.
Shipping costs have tripled in the past 4 months as well as aluminum prices. It is a trying time, but I will continue to stay in the game and do all that can to communicate to you all changes that may be coming as soon as I possibly can.
Feel free to contact me directly if you have questions [email protected].
I have said for years that the .22 Gauntlet barrel just does not do well with slugs. I say that from two different perspectives.
One is that the advantages of what slug offers a shooter in terms of ballistics which are not fully realized at 50 yards or less.
Two is just the geometry of a slug means it has more contact area with the bore which equates to more friction and in turn requires more energy to move that slug down the barrel. A stock .22 Gauntlet just does not generate enough power to effectively execute that energy requirement. That doesn't mean there won't be some that show that they shoot slugs out of their Gauntlet no problem but the question is, What is the performance data associated with that launch?
The Gauntlets relatively slow twist rate means that the spin stabilization that a slug depends on can only be achieved by a faster rate of travel down the bore thus spinning the slug faster. We have already established that the power Generation of a .22 Gauntlet is just not quite enough to get that done.
It has been my experience that the manufacturing process of .22 Gauntlet Barrel creates an acceptable pellet barrel. There a couple of reasons why.
One a pellet has a wasp waisted design that makes contact in two separate locations, the head and the skirt and therefore contact area is less and any deep grooves or anomalies imparted in the lead are not linear.
Two a pellet is drag stabilized so by just its design shape and geometry will right a lot of wrongs to a certain degree.
The leadin or chamber area of a Gauntlet .22 barrel is way too shallow in the chamber and also way to steep of a transition into the bore.
Here is a video that shows you exactly what I mean. That is the transfer port you see in the video. As you can see by the very shallow transition step which is literally at the transfer port's edge means you are deeply engaging the rifling before your projectile is even past the transfer port.
Part of what I do in my barrel tuning service is push that shallow leadin deeper into the bore and also stretch out the transition for a smooth loading action.
Now looking at that transition and leadin can you understand how there would be considerable lead deformation and filings produced during the chambering of slug into that bore?
So while there will be some that will show that they are getting great results with slugs, I ask to see some Sub MOA or even MOA groups of these slugs prints. I have tested over 30 .22 caliber slugs in the .22 Gauntlet and have yet to find one that delivers acceptable results at distances that take advantage of the energy retention of a slug.
Announcing a major performance enhancement for your Umarex Gauntlet. The Flex Reg will allow you to on the fly adjust your output pressure either up or down by 800 to 1000PSI! Hajimoto Productions have configured the regulator in two flavors.
For the .177/.22 Caliber Gauntlets pressure range adjusts from 500PSI to 1500PSI.
For the .25 Caliber Gauntlet pressure range adjusts from 1400PSI to 2400PSI
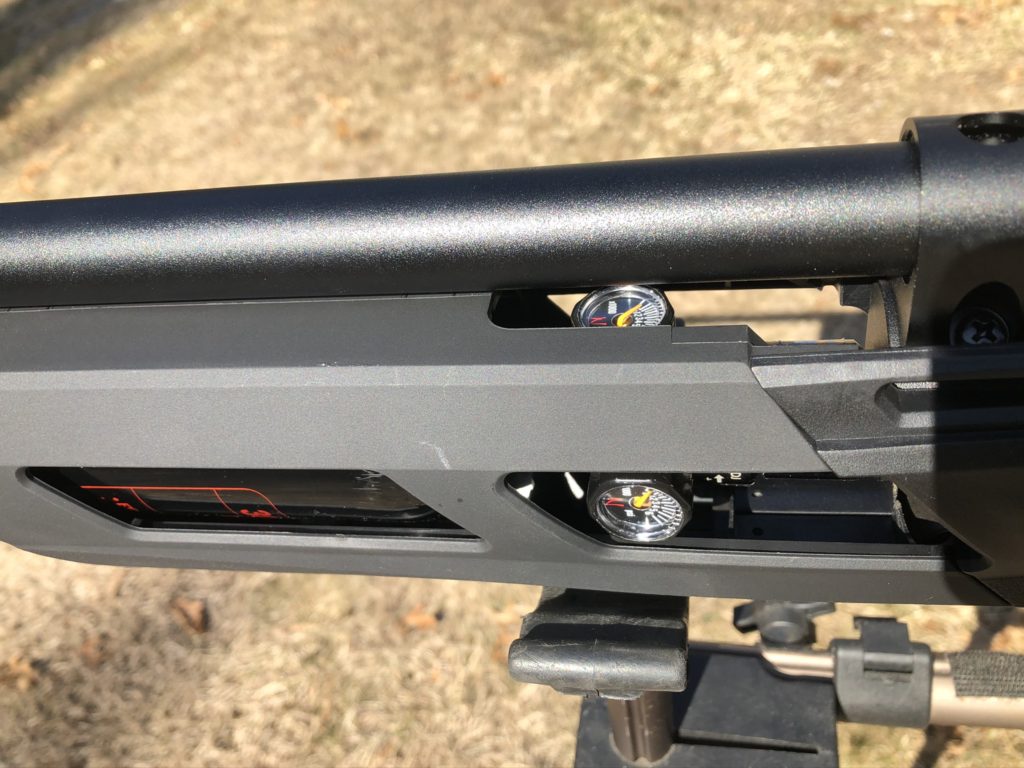
The new Hajimoto Configured Flex Reg installed on a 100% stock Gauntlet
As you can see there are no modifications required to the stock. Both gauges are clearly visible and allow the user to adjust on the go to suit their needs based on the projectile being used.
These are radar results from the installation and adjusted Flex Reg on the .22 Caliber Gauntlet. Can you imagine what those number will look like after the STK is installed!!
A stock .22 caliber Gauntlet with the regulator set to its factory 1100 PSI will fly JSB 18.13 grain pellets at about 786 FT/S. Once the Flex Reg is installed and cranked up to the maximum of 1500PSI, the same 100% stock Gauntlet delivers the 18.13 Grain pellet at a whopping 900 FT/S!!!
The Flex Reg is available alone or mounted on the extra capacity 22ci tank for the best of both worlds, more power and more shots!
Insert the email id for which the coupon was issued
Please be sure to understand our return policies prior to making your purchases. All products offered on our website are intended for use on airguns only. It is a violation of Federal Law to use a product in a manner inconsistent with its intended labeling or use. It is the purchaser's responsibility to know the ordinances and laws of their state or county and to fully comply with them. Dismiss