Hard to load your round into the bore???
The difficult chambering issue is something that I have witnessed and documented in the past and there are a few things that you can do to alleviate some of the effort to chamber a round. I am going to get a bit geeky here but I want to describe what the internal of a bore look like from the breech end to the barrel.
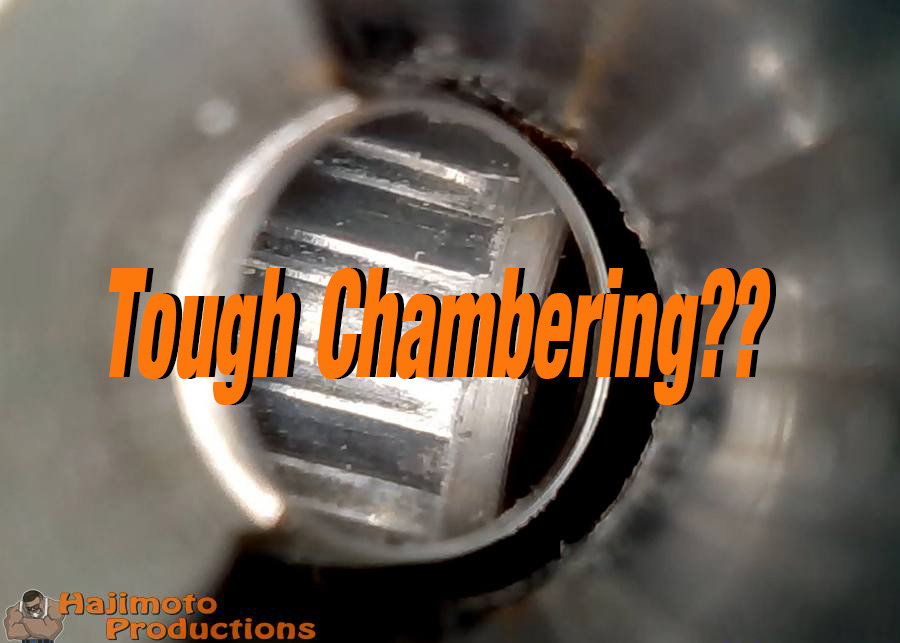
Typically the breech will be just large enough to accept the projectile being offered and allow it to be transported by the pellet probe or cocking bolt into the chamber area of the barrel. Along the way to the final resting spot prior to firing the rifle, the projectile is being led into a narrowing transfer passage which introduces the projectile to the rifling. This chamber or lead-in (leed in) area of the barrel should be a smooth and gradual transition from breech to chamber. The Gauntlets breech to chamber transition is very steep and shallow. SEE PHOTO A BELOW

If you use a projectile with a fairly soft lead it will be able to be wedged past that very sharp and abrupt step you see there in the lead in but harder ammo like H&N or Crosman will be very difficult to push into that hard edge.
So what to do? There are a few things to consider.
- If you continue to use the rifle and continue to chamber round after round after round that edge will soften over time or “break-in” but if you’re in pain and the effort negates the interest to continue, that is not an option.
- You can use only soft lead projectiles like JSB or FX which will require far less effort to chamber but that would limit your ammo choice and put you in what I consider “Premium Ammo Cost”.
- Physically working the problem, mechanically changing the chambers’ current state.
Of these options, 1 & 2 really do not need any further discussion because they are what they are.
Option 3 means you void your factory warranty. So you will have zero recourse for any future warranty claims. Option 3 can be achieved in two ways.
- Commission a gunsmith to execute the work.
- Do it yourself.
Option 1, means you contact your trusted gunsmith like me and have them perform the barrel modification. If you do not have a trusted gunsmith and need one, ask around and get some opinions from your brothers and sisters in the airgun community. Hopefully, you will have someone local to you and it will make the modification a simple drop-off and pick-up affair.
Option 2, As I have publically demonstrated over the years, I am very much a DIY type of guy and I do not allow warranties to govern my level of enjoyment with a product that bought and own. Now please understand that I am saying that a $30,000.00 purchase falls into this category, I do apply reason to the situation and here we are talking about a total loss of $400 if I completely destroy the product. Which to be honest could never happen, at worse, I’d need to replace the barrel.
That said, there are a lot of means and methods to soften that hard edge or to deepen the chambering portion of the lead-in. It can and has been done by many DIY gunsmiths in the past. The best way is the way that gets it done for you. I have seen guys use a fine-tooth rasp and work those edges down by hand working through the breech, I have seen folks use a Dremel with finely tapered stone attachments, I have even seen folk purchase a tapered ream and work the transition. Any of those techniques will work but they have a risk of introducing inconsistency to the landings which can cause projectile deformity and possibly cause inaccuracy issues.
If you do take on the DIY approach, I recommend two variables be employed when doing something for the first time.
- Work slow.
- Be concentric.
Point number 1 means staying away from course or rapid material changes. Use very fine tooling, sandpaper, emery cloth, polishing papers, or what have you, this affords you the luxury of time. Take it slow and easy which will prevent catastrophic material removal leaving you with a worse scenario than when you started.
Point 2 means using something that keeps tooling in the center and that works all points of contact at the same time. This is where lathes come in handy because they help eliminate the runout (inconsistency along a length) that can be caused by doing things by hand but I am here to tell you, you do not NEED a lathe if you work slow and a concentric as possible.
One method that I used for years was the tapered and partially split wooden dowel method. It is achieved by using a wooden dowel close to the size of the bore that is sharpened like a pencil at one end and the tip is split down its length for the first 1.5″-2″ to allow 2000, 3000, or 5000 grit wet sandpaper to be introduced. You can lock the barrel in a soft jaw vise and chuck the dowel in a variable speed drill motor or cordless drill. This tapered ultra-fine grit assembly is introduced into the breech and allowed to work that shoulder down and create a smooth polished ramp into the chamber.
I can expand on this or other DIY means and methods but I am certain that you will find some content out there that will demonstrate what I have described above. Please let me know if you have any additional questions or comments.